A perk of being a country girl in the city is having a physical and mental resistance to climbing temperatures once summer finally hits.
It’s the lesser of two evils sometimes; especially, when you love cooking during the summer months. The swelter of a New York apartment once the oven is turned on is, well it IS a given. For avid cooks, who happen to also have air conditioning, there is the delicate dance of knowing exactly when to start cooking in 80˚+ weather, and when the perfect time comes to turn on the AC to fight against both the indoor and outdoor heat.
A very delicate dance! One slip in timing and you’ll sweat if you do, you’ll sweat if you don’t!Growing up in Charleston, where much of my childhood was spent without an air conditioner, we relied on the timely clockwork of Ocean breezes feeding in to marsh waters. Beyond that, my Grandmother had the perfect solution for cooking during summer months.
I’m still working on the diligence that sort of homemade “three meals per day” culinary discipline takes.
In the mean time I faithfully use my slow cooker.A recent tangle with our crock pot produced fantastic results in a no fuss curry inspired light stew of pork ribs and vegetables - a dish that would have required hours of braising on top of the stove and just as many hours roasting in the oven. I simply COULD NOT that day! As the temperature climbed outdoors, the little one and I stayed cool indoors, chipping away at chores, all the while cooking our slow cooked one pot wonder.
By midafternoon, I felt quite accomplished! By evening, and dinnertime, I knew I’d done our cool comfortable home a huge service, and my Grandmother proud!Curry Inspired Pork Ribs
Yield: 6 – 8 Main Course Servings
Special Equipment: At Minimum a 6 quart Crock Pot/Slow CookerThe Madness: The Ingredients
The Vegetables
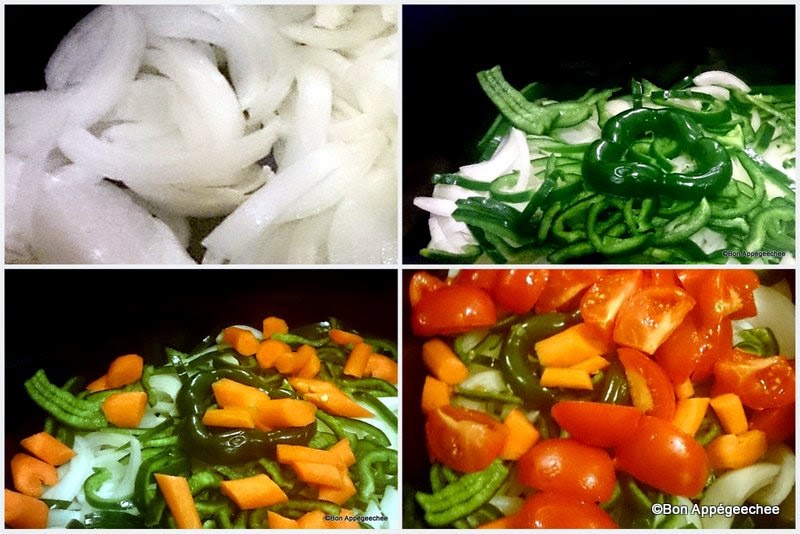
1 large white or sweet onion
1 large poblano9 small thin carrots (approx. 3 cups of chopped)
1 lb of sweet baby tomatoes on the vine
3 – 4 stems of fresh thyme
3 – 4 stems of fresh thyme
1 quart of vegetable or chicken stock, divided in to half, then set aside
3 tbsp of ap flour for slurry to thicken gravy
1 10oz box of frozen or 1 1/2 cups of fresh peas
The Protein
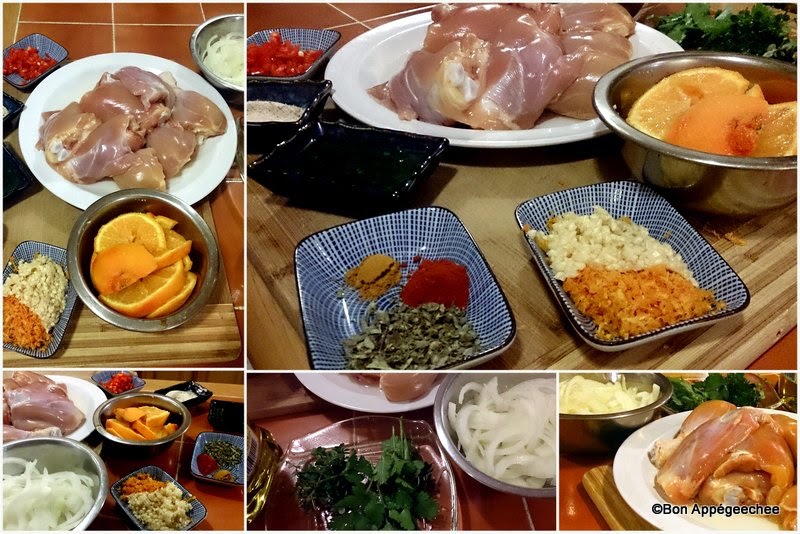
3lbs of sliced pork ribs
1 tbsp extra virgin olive oil3 tbsp of ap flour for dusting, set aside
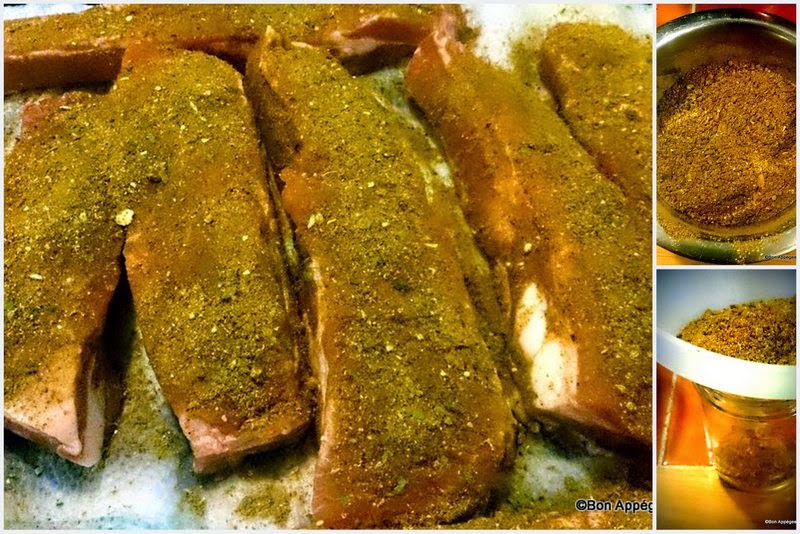
Curry Inspired Seasoning Rub for the Ribs
2 tbsp of garam masala
1 tsp of ground coriander seeds1 tbsp of favorite ap seasoning blend
1 ½ tbsp ground coriander
½ tbsp onion powder
½ tbsp ground cumin
1 ½ tsp of smoked paprika
½ tsp of kashmiri pepper (can substitute ground cayenne pepper)
½ tbsp dried cilantro
½ tbsp dried oregano
1 tbsp of curry powder
1 tbsp of turmeric

Keeping It Real Disclosure:
The curry inspired seasoning rub for the ribs per the recipe above yields just over ½ cup of seasoning mix. For this recipe, I found that I used just over ¼ cup of the rub. This leaves me with enough rub for next time I’m in the mood for a quick curry inspired meal, OR you may find that your taste lends itself to using a bit more rub than I do. Here, you have plenty! Trust your pallet. Example: By reflex, I found that as I layered the vegetables in the crock pot, I sprinkled a bit more (a teaspoon or so) of the seasoning here and there to build complex layers of slow cooked flavor.

The Method: The Assembly
Once the ribs have been removed from their purchased packaging, rinse them and be sure to remove any excess fat that may be hanging around. Pork ribs are well marbled, any excess fat can be removed without worry of drying out your ribs.
Place the ribs on to a paper towel lined baking sheet to dry the ribs. Once dried, sprinkle them liberally with the spice rub. Be sure to coat all sides.
Set them aside.
Peel and slice the onion in half. Place the flat side of each onion half against your cutting board, and then slice across each half until you have sliced your entire onion in to thin strips.
Start layering the slices of onion into the crock container of your crock pot.
Perform the same slicing and layering method on your washed, de stemmed, and deseeded poblano pepper.
Rinse, peel, and chop the carrots in to large chunks. Place them in to the crock.
Rinse and quarter the tomatoes, once they have been removed from their vines. Place them in to the crock on top of the carrots.
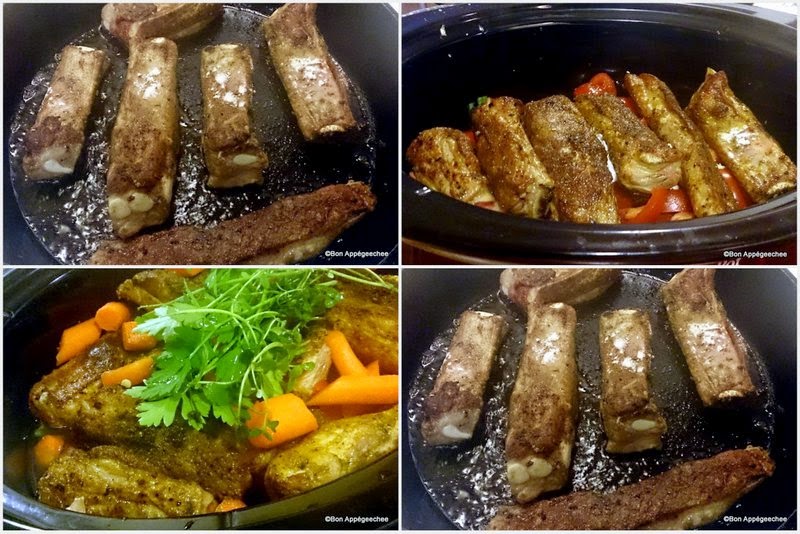
In a large cast iron or fry pan heat the extra virgin olive oil over high heat.
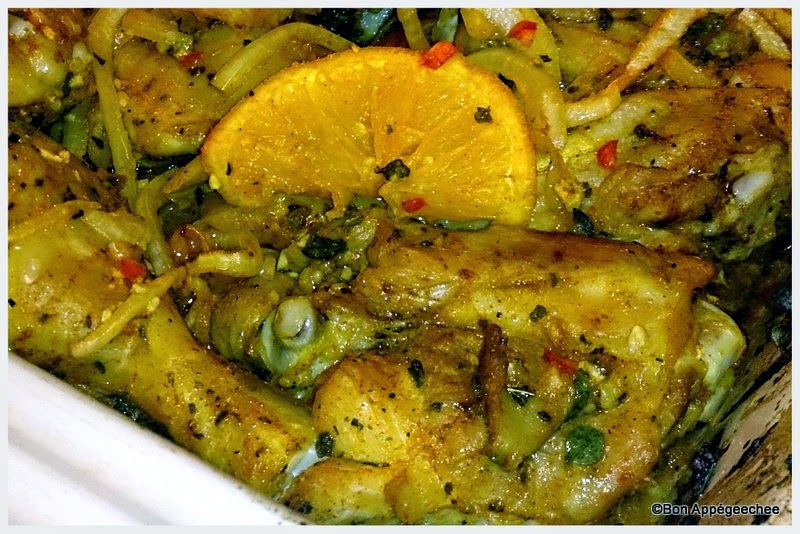
Lightly dust the seasoned ribs with ap flour. Shake any excess flour from the ribs. Place each rib in to the heated oil. Sear each side of the ribs until browned, approximately 2 – 3 minutes per side. Searing the ribs first develops a richer flavor in the crust that permeates the crock pot liquids to build even tastier and more complex gravy in the end.
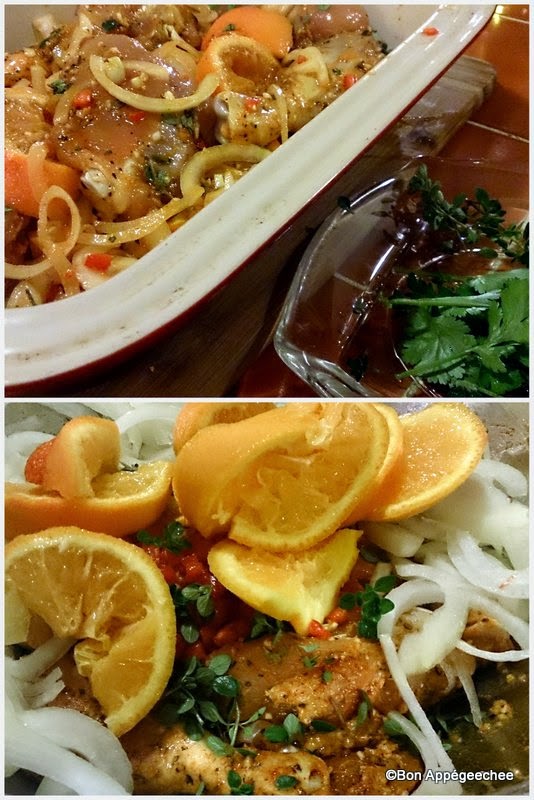
Once seared on all sides, place the ribs in to the crock pot on top of the layered vegetables. Pour half of the quart of stock (2 cups) on top of the ribs and vegetables. Finish with placing the fresh herbs on top of the meat and vegetables.
Cover and cook on low for 6 hours.
Check your meal periodically, though sparingly. If in that time you find that you need additional liquid, add some of the reserved stock ½ cup at a time. Chances are, you won’t need it.
Once the dish has been cooking for 6 hours, create what is called a slurry to thicken your developing curry inspired gravy.
Take the 3 tbsp of ap flour remaining and place it in to a small bowl, add approximately one cup of the developing gravy from the crock pot. Before adding the gravy to the reserved flour, taste the gravy for seasoning. If you need additional seasoning to taste, add more of the rub mix to this slurry. Whisk the flour, additional seasoning, and stewing liquid until well combined, and smooth.
Pour the slurry in to the crock pot with the simmering meat and vegetables; stir the slurry in to the developing gravy. Cover and cook for an additional hour. During this time, your gravy will thicken, becoming more luscious.
When your stew is about a 1/2 hour from being of perfect tenderness and consistency, add peas. Cover to allow peas to cook through.
When your stew is about a 1/2 hour from being of perfect tenderness and consistency, add peas. Cover to allow peas to cook through.
Dinner is ready to be served when you are ready to receive it!
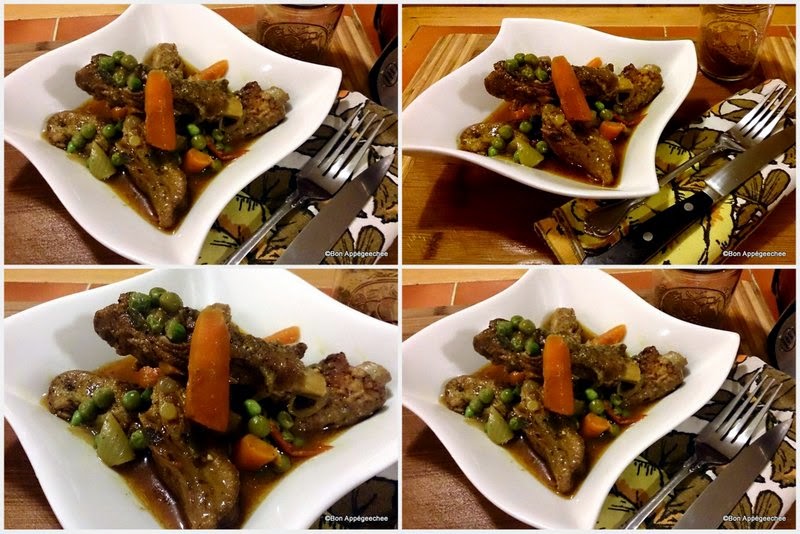
As always, Enjoy!
xo, Bon Appégeechee